A little piece of writing that aims to introduce the zone system clearly and succinctly
The zone system is a method of controlling tone in black and white film photography.* It enables the user / photographer to have confidence that tones visualised when the shutter is pressed will be the tones seen in a final print. It involves undertaking careful film exposure and development testing (linked to an individual’s equipment and working habits) and removes the doubts of ‘hope it will come out’ photography.
Seeing the final print with the help of zones.
As the name suggests, the technique divides the tones to be recorded into a set of steps or ‘zones’. Thanks to the testing work that is done, the zones link to precise values of tone in the final print, meaning that the photographer can learn how the world seen translates into broad degrees or groupings of tone on paper. Within an individual’s photography practice, the zones are precise and repeatable (or they should be). After testing, a given exposure will result in a given tone. The photographer uses this as a kind of secret weapon: seeing the world in rough zones of tone that will end up looking the same in their work.
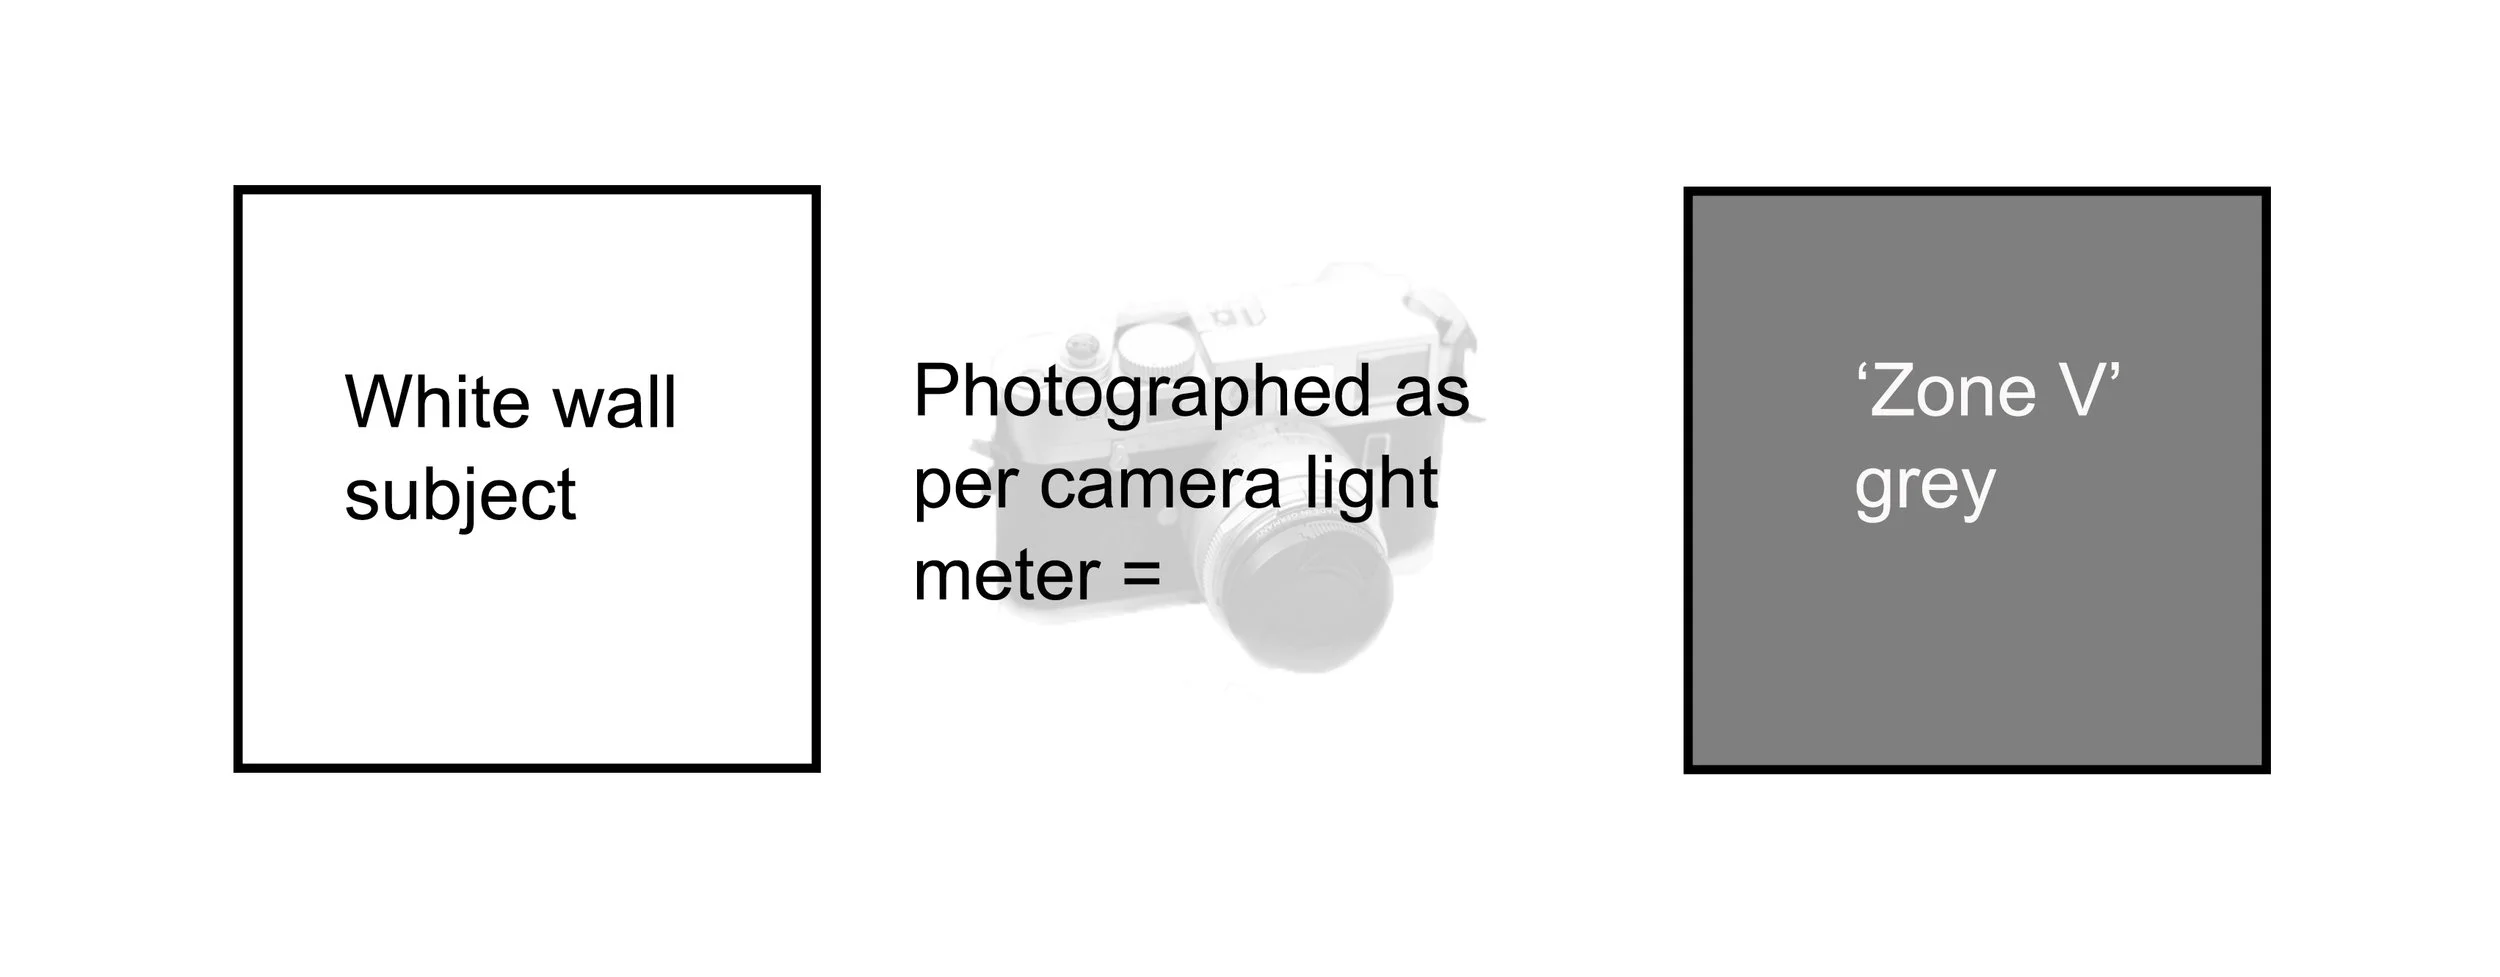
There are some key technical principles that make the zone system possible. A simple light meter reading of an empty white wall will yield a mid-grey tone. All light meters are calibrated to yield the same mid-grey tone. This explains why novices are sometimes disappointed when photographing white subjects. Their white subjects come out grey (which is often a shame for snow scenes).
This mid-grey we call zone V. Now imagine the same white wall exposed for a stop less. This will yield zone IV. Another stop lower, and we have zone III. Zone I is very nearly pure black. We go up the other way too: a stop over, that’s zone VI. Zone VII is a light grey, IX, well, white with little tone at all.
A graphic of the zone system scale.
However, there is a problem because when we develop our film we are normally using a manufacturer’s recommended film speed and development time. So whilst theoretically your and my zone V exposure should register the same on our negatives, variations like shutter speed calibration, developer temperature, development agitation technique and so on will introduce variation. More often than not, it is also true that the manufacturer’s recommended film speed leads to a somewhat dull zone V, together with shadows lacking detail and greyish highlights.
We can overcome this problem by generally giving our negatives a little more exposure. The common wisdom says ‘expose for the shadows’ - i.e. give more than the manufacturer’s recommended exposure for the shadows. Zone system users are a bit more systematic about this, so they set up a scene in controllable lighting with good shadow detail and photograph it at different ISO values (e.g. for ‘400’ speed film, you might expose as if the film were 400, 320 and 250 ISO). The printed image that yields shadows with good detail and mid-tones that aren’t too dull becomes the new film speed, for that photographer and only that photographer (because of equipment, technique and paper).
Contact prints of my personal film speed tests on 5x4 film. There is a clear difference between the manufacturer’s recommended 400 ISO and 250. At 250 the shadows are much more open and the mid-grey much lighter and livelier.
This isn’t quite the end of the story because while changing film speed can be good for shadows and mid-tones, it doesn’t help us control the highlights. Put another way, throwing about ‘extra’ exposure can result in highlights that are too dense to print. Film has a special quality when being developed that we can exploit, and the zone system does just that. Simply put, shadow areas develop very quickly, while highlight areas, made up of more density on the film, take longer. (At this point I like to imagine the film in the development tank, the negative going through its chemical reaction.) We can therefore cut development time and pull back highlights without altering mid and lower tones. The saying I quoted above wasn’t complete: we ‘exposure for the shadows’ (film speed) and ‘develop for the highlights’.
How do we know when to pull back development time to control the highlights? Here we come to the final part of essential zone system practice, the use of a spot meter. When in the field, zone system practitioners use a spot meter to determine the tonal range of the scene in front of them. If the highlights where texture is required fall beyond zone VIII, the photographer can take action to effectively compress the zones. Roughly, a 15% reduction in development time leads to a one zone reduction or compression of the highlights. A large format photographer, shooting one sheet of film at a time, is free to give that one sheet bespoke development. Excitingly, it works the other way too: the upper zones can be expanded if more development is given. This bestows huge creative control, allowing the photographer to impose a particular vision that in fact departs from the literal tonal rendition of the scene.
Of course, it isn’t just the highlights that the zone system photographer can change. Normally, the practitioner makes a decision about which part of the scene will be recorded as zone III - dark, but detailed shadow - and ‘places’ the shadows on that zone. The highlights will then ‘fall’ at another point and development control may or may not be required. Yet it is not written in stone that a print should have shadows on zone III. Sometimes a pale tone image may be desired and the shadows placed much further up the scale (although there will be consequences for the highlights).
By writing ‘place’ and ‘fall’, I’m slipping into zone system parlance which is perhaps problematic for a piece of writing that wants to be succinct! Doubtless, zone system and succinct are somewhat opposed. It’s worth just pausing here to reiterate an essential principle. If a photographer takes a spot meter reading from a shadow area in a scene and exposes the whole negative using those values, that area will come out as a mid-grey (zone V). Reducing the exposure by two stops will result in a tone two stops darker (zone III). Once you place one tone - you only get one aperture and shutter speed choice after all! - everything else falls into place relatively. Highlights that might fall in zone VIII with a zone V placement of the shadows will end up being on zone VI with the zone III shadow choice. This sounds very complicated but it is in fact relatively easy to measure the relative brightness of different areas while out in the field using a spot meter.
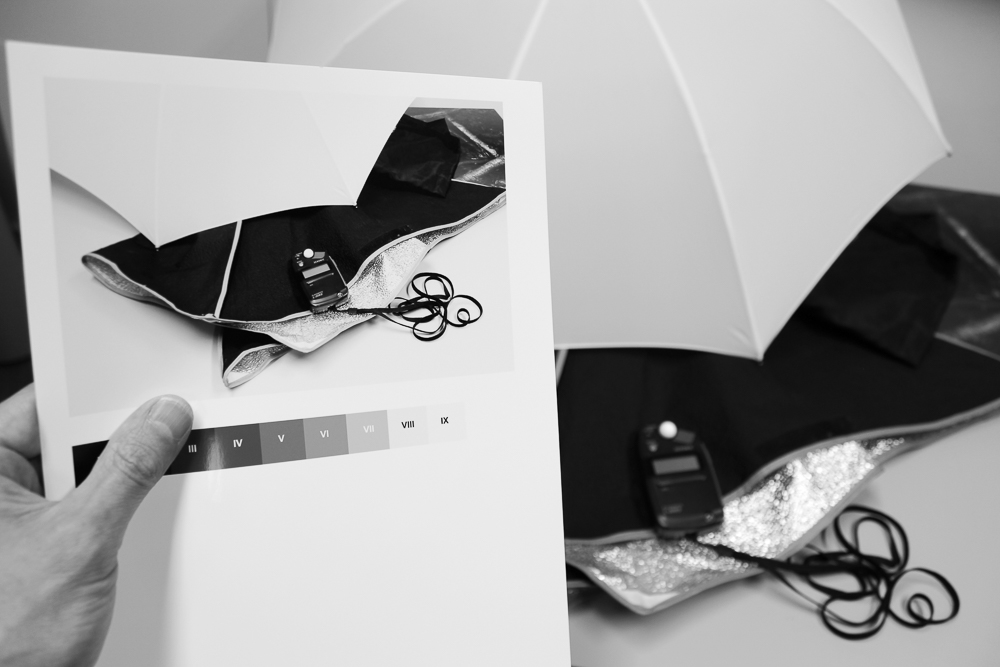
In this simple studio scene a spot meter was used to take a reading from the white umbrella. This produces a zone V umbrella, as per our earlier white wall example. In zone language we say that we have ‘placed’ the umbrella on zone V. Other areas now ‘fall’ at other points on the tonal scale: we have a zone III black softbox cover, a zone V table top and a zone VI foil softbox inner.
A one stop increase in exposure results in a ‘whiter’ umbrella, sitting on zone VI. Because we’ve now placed this on zone VI, the other areas we mentioned move up the scale accordingly: we’ve got a zone IV black area, a zone VII foil inner and a zone VI table top. We could place the umbrella on VII to visually bring it more in line with what a white umbrella should look like, but the consequence would be a mid-grey black area on the softbox cover, which is actually black. A zone system approach to the problem would be to go with the second of the two exposures, but increase development to make the umbrella lighter.
To summarise, the zone system is about tonal control. It involves undertaking a precise series of tests to determine a personal film speed and development regime. It enables the photographer to work with a shorthand grouping of tones called zones to visualise how the final print will turn out. More than that however, it allows the photographer to depart from a simple or literal rendition of the scene and to create new tonal relationships. Thanks to the precise testing and repeatable results, not to mention careful use of a spot meter in the field, the photographer can have confidence that the tones envisaged - within the limits of what the film and paper will allow - will be the tones achieved. A powerful tool indeed.
*The zone system was developed for film photography in its original context, however versions of it are employed by digital photographers too.


